Vector art and Product design . Winter 2011
FAB LAB San Diego, in Partnership with UCSD Extension and The San Diego Supercomputer Center present a series of digital media and fabrication courses for high school students.
In Vector Art and Product Design students learn to design shapes in 2D in order to translate their designs into 3-dimensional objects. Through this process, students will learn to use vector-editing software such as Adobe Illustrator to create products that will then be cut using a plotter. Students will learn about design, prototyping, geometry, CNC machines, and product creation while making their own fun characters.
Topics such as platonic solids, 2D to 3D design, packaging, product design and production will be explored in a hands-on setting. In addition to creating vinyl decals for decorating the surfaces of their flat-pack characters, students will learn to create vector artwork that will be cut and folded into 3-dimensional objects in order to create 3D characters in the likeness of their choice.

Creating vector artwork with Adobe Illustrator

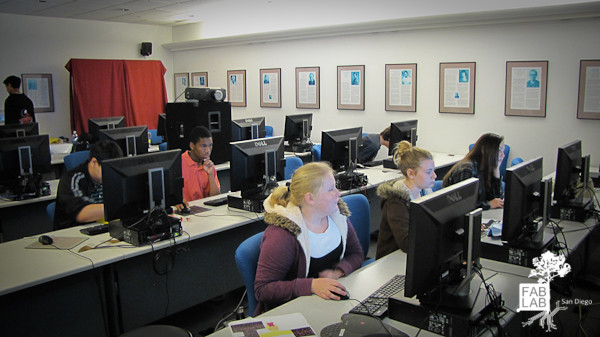
Vector Art and Product Design students at work

Vector Art and Product Design students at work

Students working with the vinyl cutter
While this class is fast-paced, it is designed to be accessible and enjoyable for newcomers to these topics, and we will review necessary fundamentals of graphic design, patterning, and packaging.
[tab name=”Photogallery”]
Module 1: Platonic Solids – Design: from 2D to 3D – Vector Images Editing Software
During the first class, students learn the process of designing from 2D to 3D, cut and fold flat-pack characters in paper and develop a design of their own using Adobe Illustrator as main tool to create and edit vector images. What they’ve learned today introduces students to solid design concepts to create their own flat-pack character.
Module 2: Vector design advanced techniques – Creating templates – Using the vinyl cutter
In our second session students worked completing the first draft of the flat-pack character they are designing in Adobe Illustrator. They learn how to use the Roland gX24 vinyl cutter to cut some of the design elements they are implementing on their characters, using clear mylar as a template and implemented a printed version of their designs for a nice professional looking.
Module 3: Final flat-pack character design – Vinyl cutter & Vector Art: Stickers
In our final class students finished their flat-pack character designs in Adobe Illustrator. Using layers they’ve created printable and vector elements they cut in the Roland gX24 and apply them on the mylar material used as template for their characters. They also cut stickers and decals with designs elements of their choice.
[nggallery id=42]
[/tab]
[tab name=”Student Work”]
[nggallery id=44]
[/tab]
[tab name=”Videos”]
[/tab]
[tab name=”Links”]
www.readymech.com
Roland GX-24 Desktop Vinyl Cutter
[/tab]
[end_tabset]